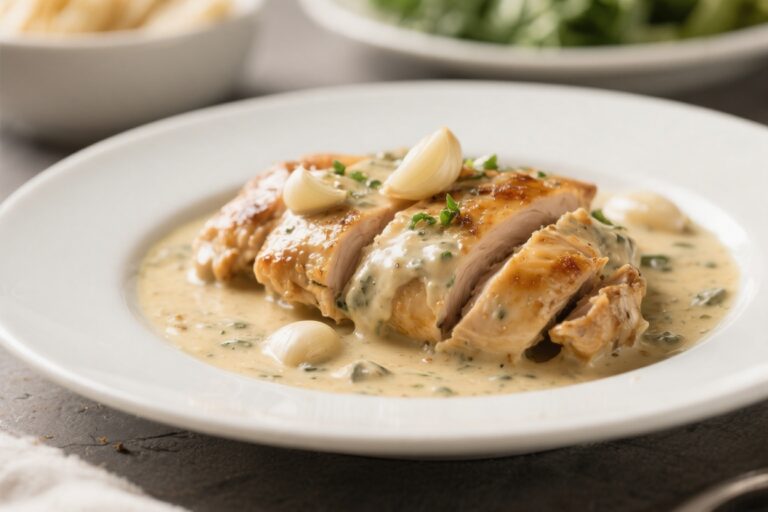
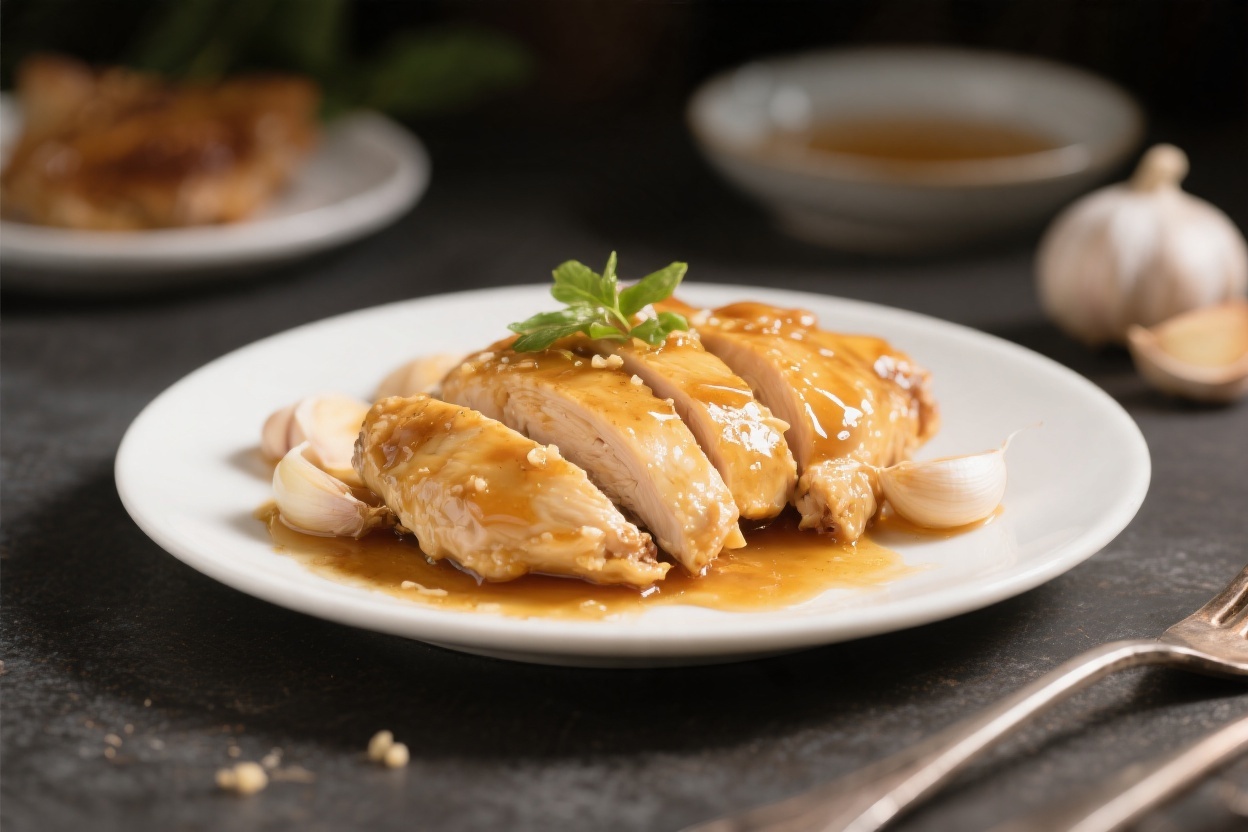
Light Honey Garlic Chicken – A Simple, Flavor-Packed Dinner
Honey garlic chicken is one of those meals that wins over almost everyone at the table. It’s sweet, savory, and a little tangy, with a glossy sauce that clings to juicy chicken. This lighter version keeps all the flavor you love, without the heavy oil or unnecessary sugar.
FREE 7-Day Easy Dinner Reset
FREE 7-Day Easy Dinner Reset
You’ll use pantry staples, quick stovetop cooking, and a few simple techniques to lock in moisture. It’s weeknight-friendly, wholesome, and just plain delicious.
Light Honey Garlic Chicken - A Simple, Flavor-Packed Dinner
Ingredients
Method
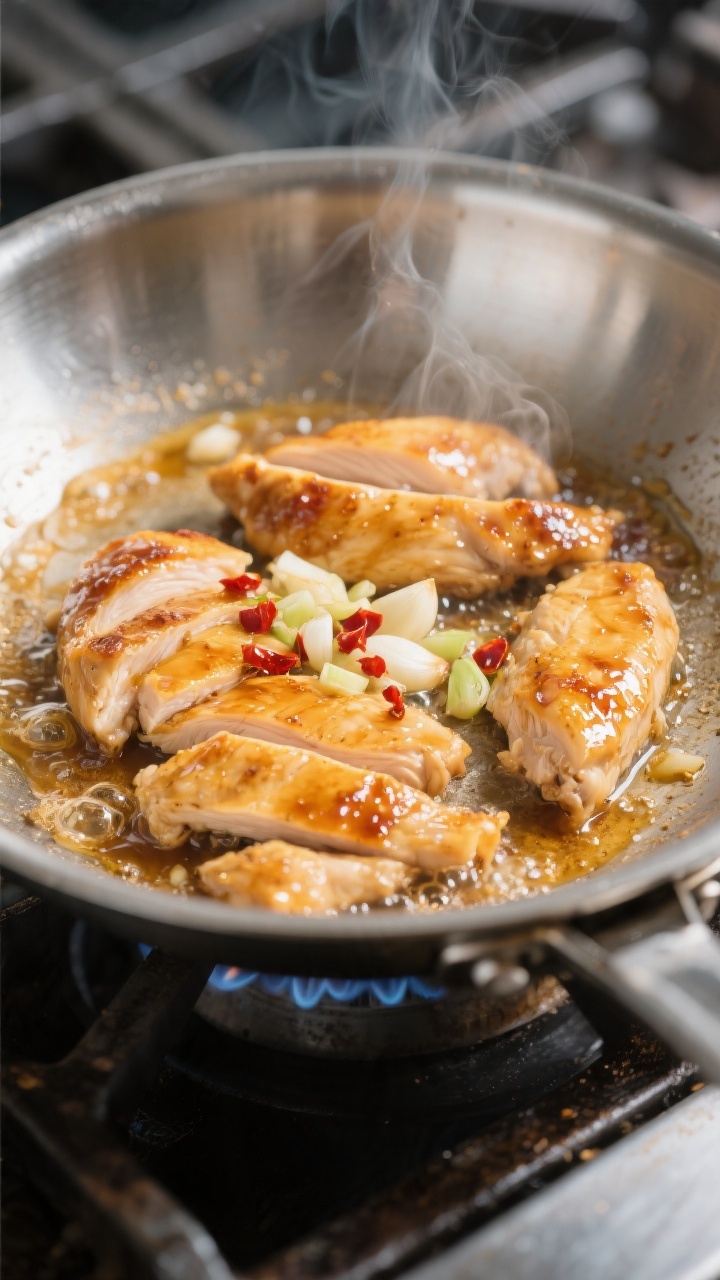
- Prep the chicken: Pat the chicken dry and slice into thin, even strips.Season with salt and pepper. Dry chicken browns better and cooks more evenly.
- Whisk the sauce: In a small bowl, mix chicken broth, soy sauce, honey, vinegar, and sesame oil. Taste and adjust sweetness or acidity if needed.
- Heat the pan: Warm the oil in a large skillet over medium-high heat.When the oil shimmers, it’s ready.
- Sear the chicken: Add the chicken in a single layer. Cook without moving for 2–3 minutes to get some caramelization, then flip and cook another 2–3 minutes until nearly cooked through. Work in batches if needed.Do not overcrowd.
- Add the garlic: Reduce heat to medium. Push chicken to the sides, add garlic to the center, and stir for 20–30 seconds until fragrant. Avoid burning.
- Pour in the sauce: Stir to coat the chicken.Simmer for 1–2 minutes. If you like a bit of heat, add a pinch of red pepper flakes now.
- Thicken lightly: Stir the cornstarch slurry, then drizzle in while stirring. Simmer 30–60 seconds until the sauce turns glossy and just coats the chicken.You may not need all the slurry; add gradually.
- Finish and taste: Turn off the heat. Taste the sauce and adjust with a pinch of salt, a splash of soy for savory depth, or a squeeze of lemon/lime for brightness.
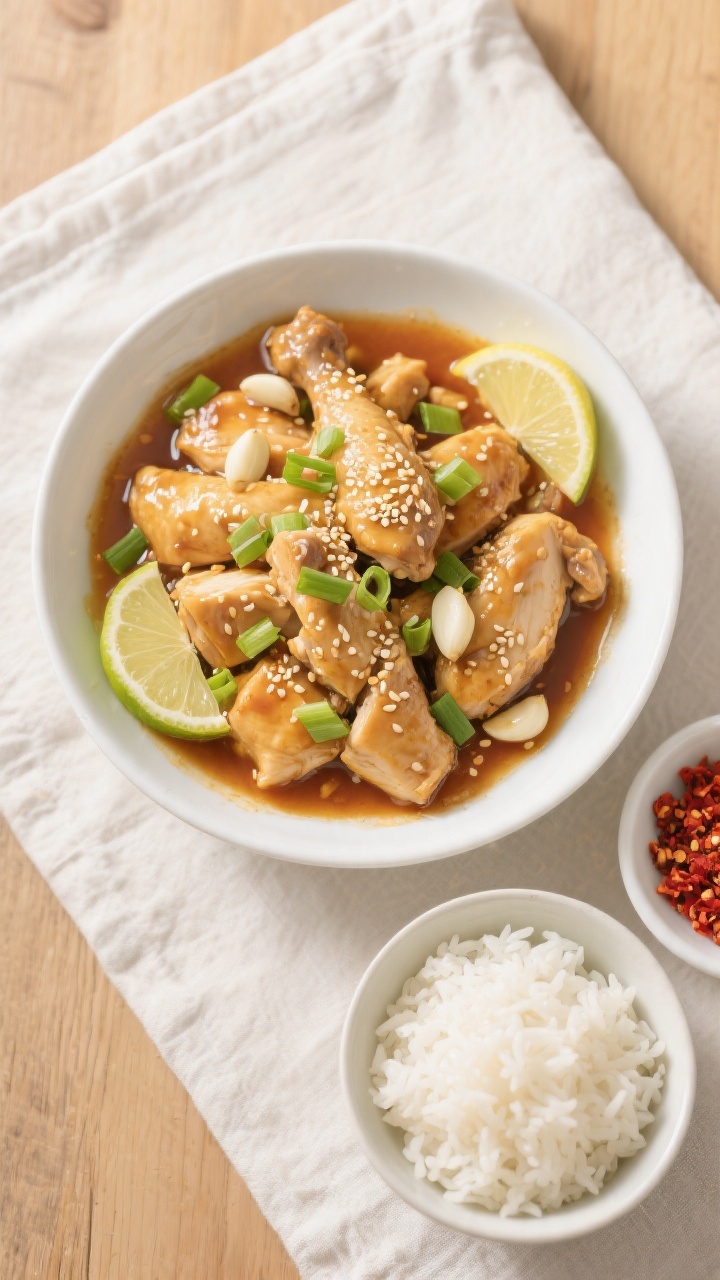
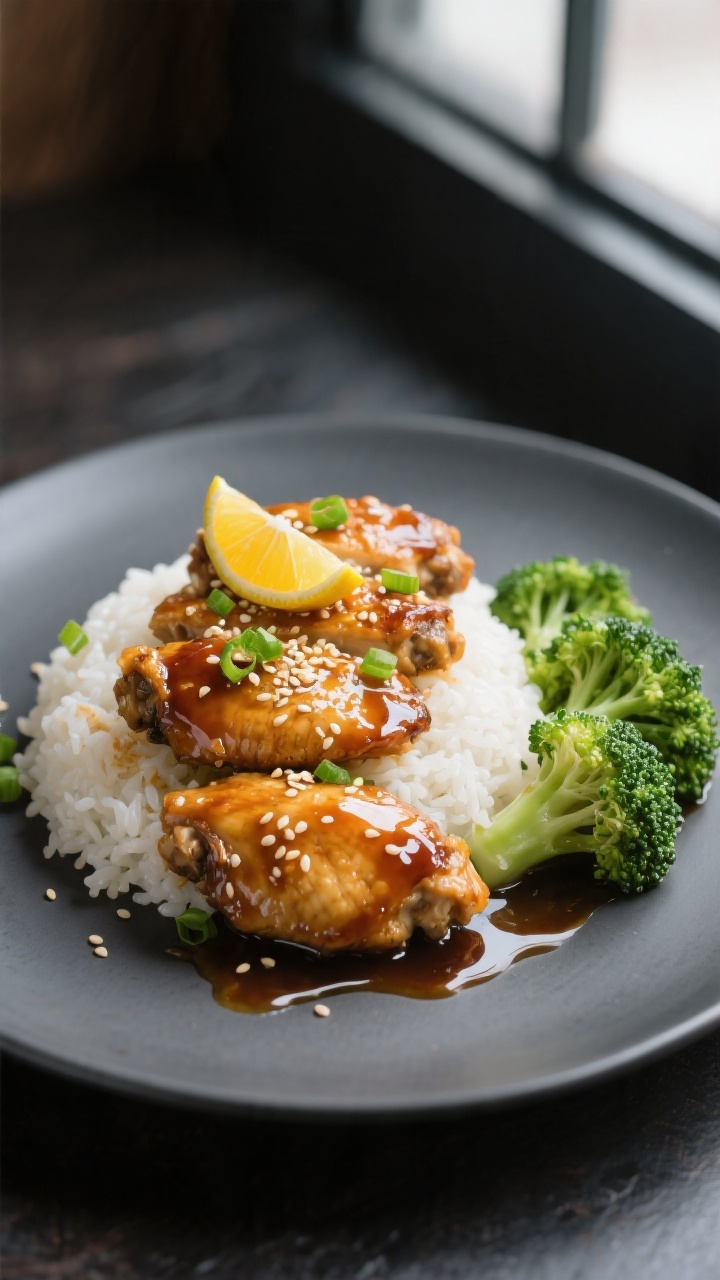
- Garnish and serve: Top with green onions and sesame seeds. Serve over steamed rice, cauliflower rice, or sautéed greens.
What Makes This Recipe So Good
- Lighter, not bland: We cut back on oil and sugar, but balance the sauce with garlic, soy sauce, and a touch of acidity.
- Quick cooking: Thin-sliced chicken cooks in minutes, perfect for busy nights.
- Approachable ingredients: Everything is easy to find. No fancy steps or special equipment needed.
- Great texture: A brief sear creates caramelization, and a simple cornstarch slurry gives the sauce a silky finish.
- Versatile: Serve it with rice, quinoa, or veggies, and it fits well with many diets.
What You’ll Need
- 1.25 to 1.5 pounds boneless, skinless chicken breasts or thighs, thinly sliced
- 1 tablespoon olive oil or avocado oil
- 1/2 teaspoon kosher salt, plus more to taste
- 1/4 teaspoon black pepper
- 3–4 cloves garlic, minced
- 1/4 cup low-sodium chicken broth
- 3 tablespoons low-sodium soy sauce (or tamari for gluten-free)
- 3 tablespoons honey
- 1 tablespoon rice vinegar or apple cider vinegar
- 1 teaspoon toasted sesame oil (optional but recommended)
- 1–2 teaspoons cornstarch mixed with 2 tablespoons cold water (slurry)
- Red pepper flakes, to taste (optional)
- 2 green onions, thinly sliced, for garnish
- Sesame seeds, for garnish (optional)
- Lemon or lime wedges, for serving (optional)
Step-by-Step Instructions
- Prep the chicken: Pat the chicken dry and slice into thin, even strips.
Season with salt and pepper. Dry chicken browns better and cooks more evenly.
- Whisk the sauce: In a small bowl, mix chicken broth, soy sauce, honey, vinegar, and sesame oil. Taste and adjust sweetness or acidity if needed.
- Heat the pan: Warm the oil in a large skillet over medium-high heat.
When the oil shimmers, it’s ready.
- Sear the chicken: Add the chicken in a single layer. Cook without moving for 2–3 minutes to get some caramelization, then flip and cook another 2–3 minutes until nearly cooked through. Work in batches if needed.
Do not overcrowd.
- Add the garlic: Reduce heat to medium. Push chicken to the sides, add garlic to the center, and stir for 20–30 seconds until fragrant. Avoid burning.
- Pour in the sauce: Stir to coat the chicken.
Simmer for 1–2 minutes. If you like a bit of heat, add a pinch of red pepper flakes now.
- Thicken lightly: Stir the cornstarch slurry, then drizzle in while stirring. Simmer 30–60 seconds until the sauce turns glossy and just coats the chicken.
You may not need all the slurry; add gradually.
- Finish and taste: Turn off the heat. Taste the sauce and adjust with a pinch of salt, a splash of soy for savory depth, or a squeeze of lemon/lime for brightness.
- Garnish and serve: Top with green onions and sesame seeds. Serve over steamed rice, cauliflower rice, or sautéed greens.
Storage Instructions
- Refrigerate: Cool completely, then store in an airtight container for 3–4 days.
- Freeze: Freeze in portions for up to 2 months.
Thaw overnight in the fridge for best texture.
- Reheat: Warm gently in a skillet over low heat with a splash of water to loosen the sauce. Avoid high heat to prevent drying out.
- Meal prep tip: Pack with cooked brown rice and steamed broccoli. Keep sauce slightly looser if reheating later.
Health Benefits
- Lean protein: Chicken breast or trimmed thighs provide high-quality protein for muscle repair and satiety.
- Reduced sugar and oil: Honey adds natural sweetness in a small amount, and minimal oil keeps calories in check.
- Sodium smart: Low-sodium soy sauce and broth help manage salt intake without sacrificing flavor.
- Garlic perks: Garlic brings antioxidants and bold taste, so you need less sugar and fat to feel satisfied.
- Balanced plate: Pair with fiber-rich veggies and whole grains for a steadier energy curve.
What Not to Do
- Don’t overcrowd the pan: Crowding steams the chicken and prevents browning.
Cook in batches if needed.
- Don’t skip drying the chicken: Moisture on the surface fights against a good sear.
- Don’t burn the garlic: Burned garlic turns bitter fast. Add it after searing and keep the heat moderate.
- Don’t add all the slurry at once: You might over-thicken the sauce. Add gradually until it lightly coats the chicken.
- Don’t overcook: Chicken dries out quickly.
Pull it as soon as it’s just cooked through and the sauce is glossy.
Variations You Can Try
- Citrus twist: Add 1–2 teaspoons of orange or lemon zest to the sauce. Finish with a squeeze of fresh juice.
- Ginger-garlic: Grate 1 tablespoon fresh ginger and sauté with the garlic for an extra kick.
- Spicy honey: Swap some honey for hot honey or add 1 teaspoon sriracha or gochujang.
- No soy option: Use coconut aminos and reduce the honey slightly since aminos are sweeter.
- Vegetable boost: Stir in snap peas, bell peppers, or broccoli after searing the chicken. Simmer until crisp-tender.
- Air fryer shortcut: Toss chicken with a teaspoon of oil, salt, and pepper.
Air fry at 380°F (193°C) for 8–10 minutes, shaking once. Simmer the sauce on the stovetop, then toss with the cooked chicken.
- Sesame crunch: Toast sesame seeds in a dry pan until fragrant and sprinkle over the top before serving.
FAQ
Can I use chicken thighs instead of breasts?
Stop wondering what's for dinner.
Get 7 healthy, family-friendly dinners complete with recipes and simple meal plans delivered straight to your inbox.
Yes. Thighs stay juicy and are very forgiving.
Trim excess fat and slice thinly so they cook as quickly as breasts.
How do I make it gluten-free?
Use tamari or certified gluten-free soy sauce and confirm your cornstarch and broth are gluten-free. The rest of the ingredients are typically safe.
Can I reduce the honey further?
You can. Start with 2 tablespoons and taste.
If you cut it too much, balance the sauce with a bit more vinegar or a pinch of sugar substitute to round out the flavors.
What can I use instead of cornstarch?
Arrowroot powder works well. Mix it with cold water just like cornstarch and add at the end. The sauce may turn glossy more quickly, so go slow.
Why is my sauce cloudy or gloopy?
You probably added too much slurry or cooked it at a rolling boil.
Keep the heat at a gentle simmer and add slurry gradually, stirring until the sauce just clings.
What sides go best with this?
Steamed jasmine rice, brown rice, quinoa, or cauliflower rice all work. For veggies, try broccoli, green beans, or a simple cucumber salad for contrast.
Can I bake this instead?
Yes. Spread the chicken on a lined sheet pan, brush with half the sauce, and bake at 400°F (204°C) for 12–15 minutes, flipping once.
Simmer the remaining sauce on the stove, then toss everything together.
How do I keep leftovers from drying out?
Reheat gently with a splash of water or broth. Cover while warming to trap steam, and avoid microwaving on high power.
In Conclusion
Light Honey Garlic Chicken proves you don’t need heavy sauces to get big, satisfying flavor. With a fast sear, a balanced sauce, and a few smart tweaks, you can put a wholesome, restaurant-worthy meal on the table any night.
Keep the ingredients on hand, and this recipe becomes a reliable go-to. It’s simple, flexible, and always a crowd-pleaser.
Printable Recipe Card
Want just the essential recipe details without scrolling through the article? Get our printable recipe card with just the ingredients and instructions.
Loved This Recipe?
If you're looking for more simple, healthy dinners your family will actually eat, grab my FREE 7-Day Easy Dinner Reset. You'll get 7 easy dinner recipes, simple grocery lists, and a done-for-you plan that takes the stress out of mealtime.