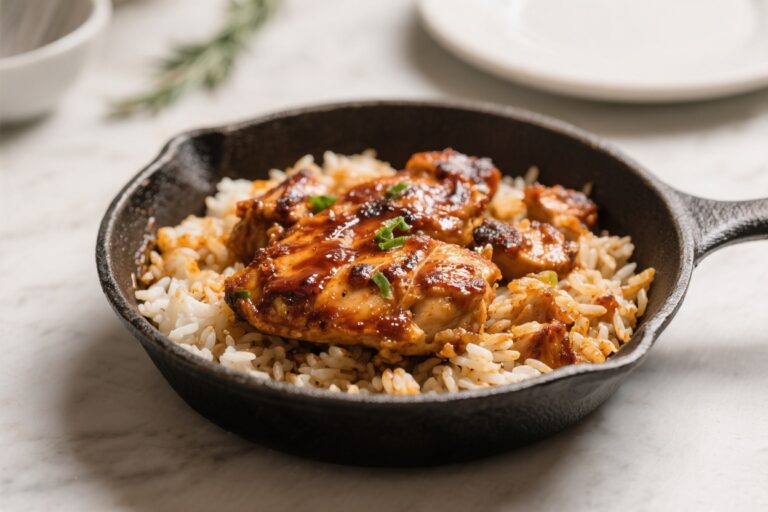
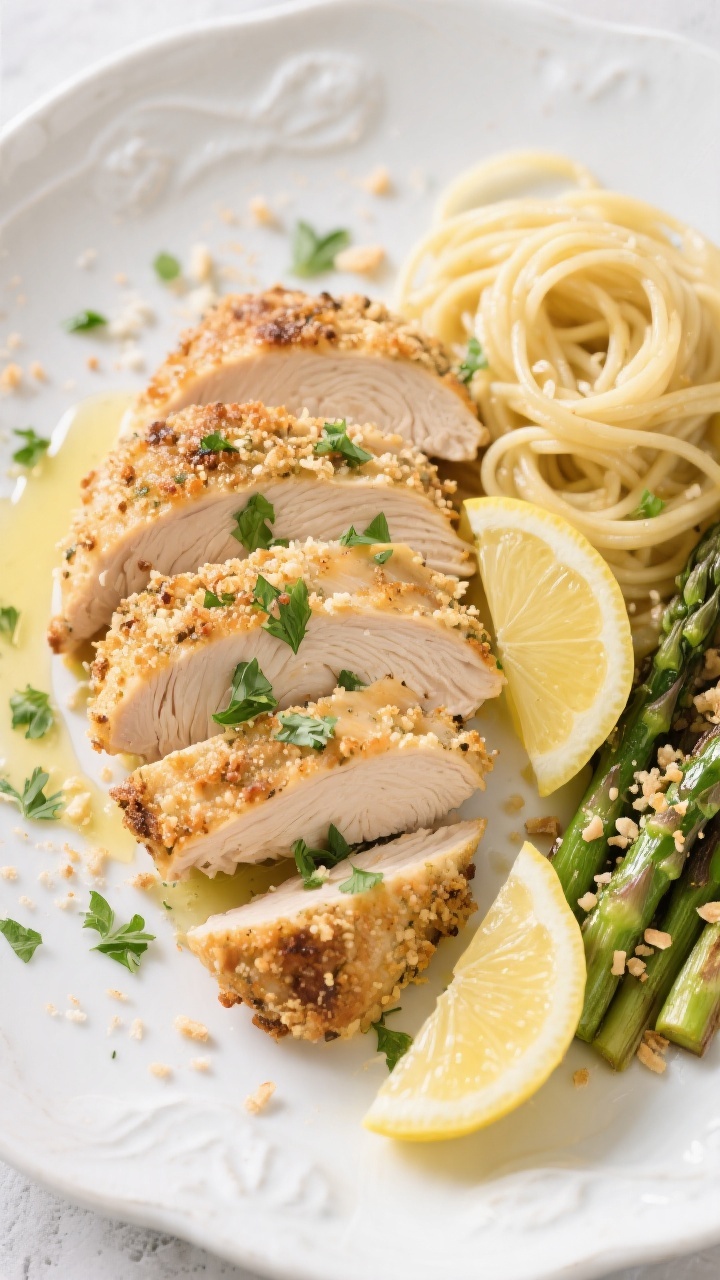
Garlic Parmesan Crusted Chicken – Crispy, Juicy, and Packed With Flavor
If you love a dinner that’s simple to make but tastes like something from your favorite cozy restaurant, this Garlic Parmesan Crusted Chicken hits the spot. It’s juicy on the inside, golden and crispy on the outside, and full of bold garlic and nutty Parmesan flavor. You don’t need fancy ingredients or complicated steps—just a few pantry staples and about 30 minutes.
FREE 7-Day Easy Dinner Reset
FREE 7-Day Easy Dinner Reset
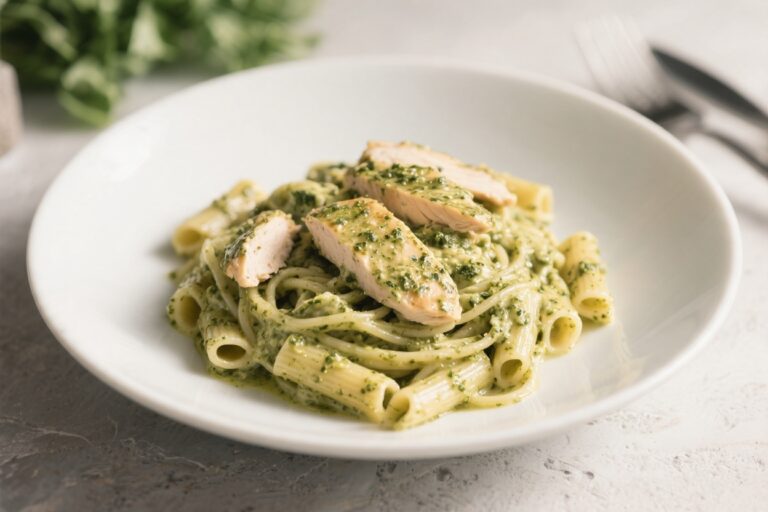
Serve it with a side salad, buttered pasta, or roasted veggies, and you’ve got a complete meal that makes everyone happy.
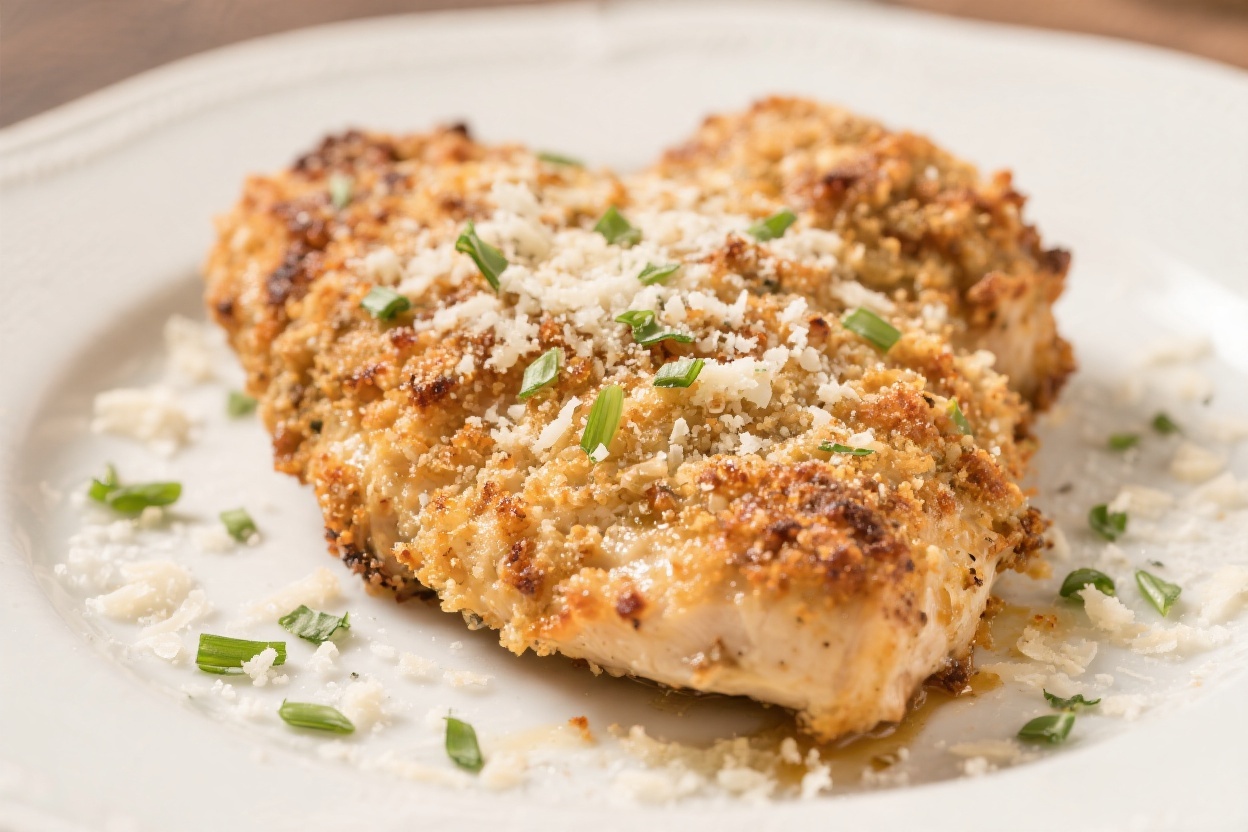
Garlic Parmesan Crusted Chicken - Crispy, Juicy, and Packed With Flavor
Ingredients
Method
- Prep the chicken: If using thick breasts, slice horizontally to make thin cutlets. Aim for about 1/2-inch thickness so the crust browns without overcooking.Pat dry with paper towels.
- Season well: Sprinkle both sides with salt and pepper. Don’t be shy—seasoning now builds flavor later.
- Set up dredging station: In one shallow bowl, add flour. In a second, whisk eggs until smooth.In a third, mix Parmesan, panko, Italian seasoning, paprika, and minced garlic.
- Coat the chicken: Dredge each piece in flour, shaking off excess. Dip in egg, then press into the Parmesan-crumb mixture. Make sure every surface is coated and gently press so it sticks.
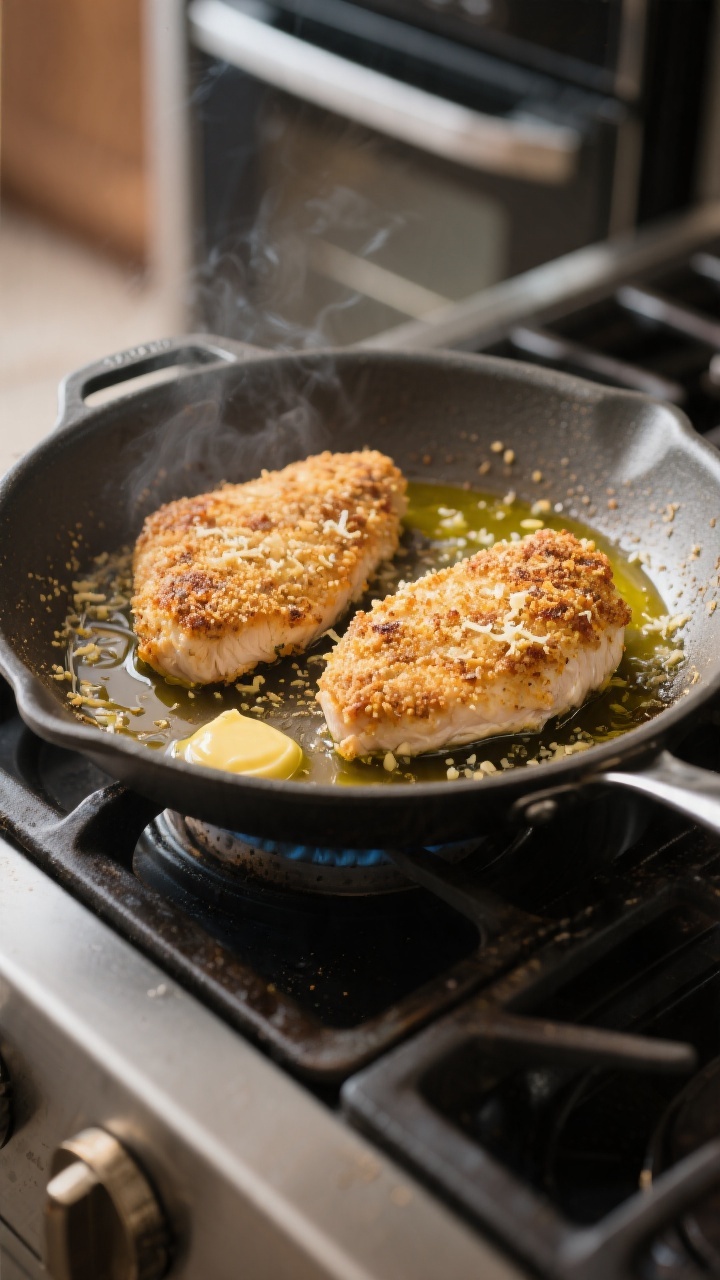
- Preheat pan and oven: Heat a large oven-safe skillet over medium heat.Add olive oil and butter. Preheat the oven to 400°F (200°C) while the pan heats.
- Sear to set the crust: Add chicken to the hot pan without crowding. Cook 2–3 minutes per side until golden.You’re looking for color, not fully cooked meat. Work in batches if needed.
- Finish in the oven: Transfer the skillet to the oven (or move chicken to a baking sheet). Bake 6–10 minutes, depending on thickness, until the internal temperature hits 165°F (74°C).
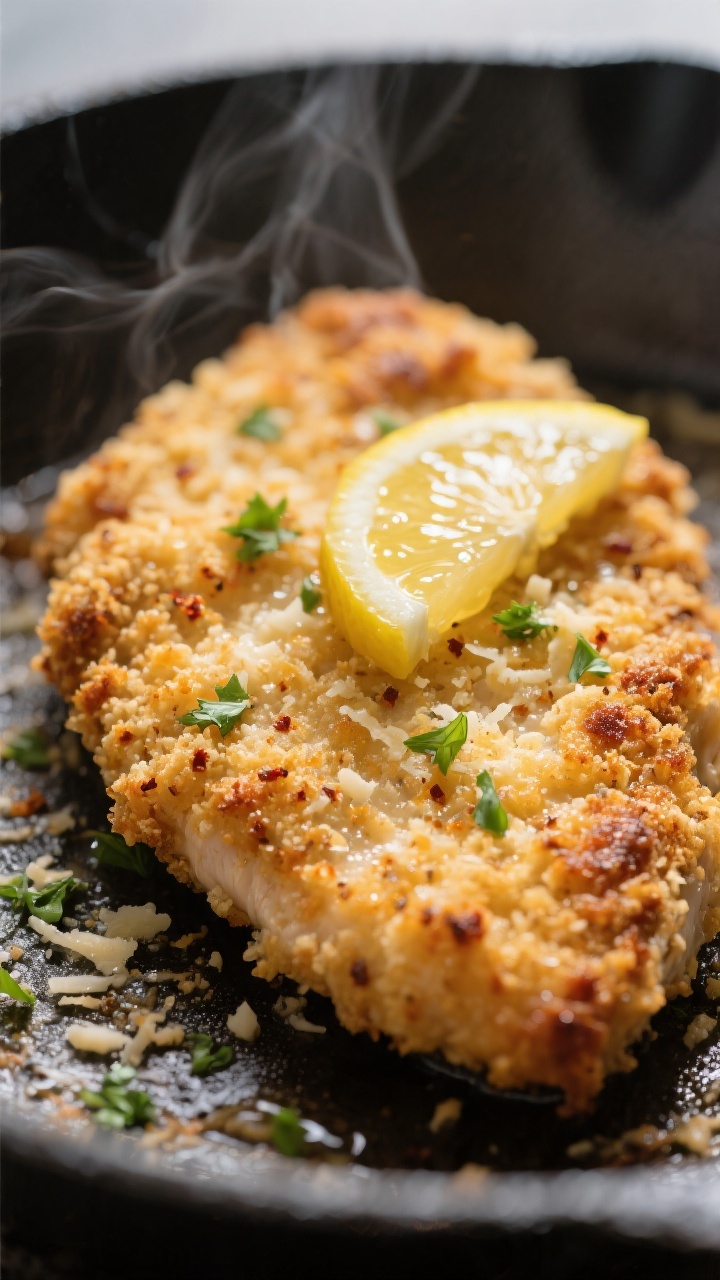
- Rest and finish: Let the chicken rest 3–5 minutes.Squeeze a little lemon over the top and sprinkle with parsley for a fresh finish.
- Serve: Pair with a crisp salad, garlicky green beans, buttered noodles, or mashed potatoes. A drizzle of extra-virgin olive oil over the top is a nice touch.
What Makes This Special
This chicken is all about contrasts: a crunchy crust and tender meat. The secret is a blend of grated Parmesan, panko breadcrumbs, and garlic that creates a crisp, deeply savory coating. A quick sear locks in moisture, while a short bake finishes it perfectly without drying it out.
It’s weeknight-friendly, but special enough for company. Plus, it reheats well, so leftovers are a bonus.
Shopping List
- Chicken: 4 boneless, skinless chicken breasts (about 1.5–2 pounds), or 6–8 thin cutlets
- Seasoning: Kosher salt, freshly ground black pepper
- Garlic: 3–4 cloves, finely minced (or 1 teaspoon garlic powder in a pinch)
- Parmesan: 1 cup finely grated Parmesan cheese (not shredded; the fine texture sticks better)
- Breadcrumbs: 1 cup panko (or regular breadcrumbs)
- Herbs and spices: 1 teaspoon Italian seasoning, 1/2 teaspoon smoked paprika (optional)
- Binder: 2 large eggs (or 1/3 cup mayo or Greek yogurt as an alternative)
- Flour: 1/2 cup all-purpose flour
- Fat for cooking: 2–3 tablespoons olive oil, plus 1 tablespoon butter
- Finish: Lemon wedges and chopped parsley (optional, but recommended)
How to Make It
- Prep the chicken: If using thick breasts, slice horizontally to make thin cutlets. Aim for about 1/2-inch thickness so the crust browns without overcooking.
Pat dry with paper towels.
- Season well: Sprinkle both sides with salt and pepper. Don’t be shy—seasoning now builds flavor later.
- Set up dredging station: In one shallow bowl, add flour. In a second, whisk eggs until smooth.
In a third, mix Parmesan, panko, Italian seasoning, paprika, and minced garlic.
- Coat the chicken: Dredge each piece in flour, shaking off excess. Dip in egg, then press into the Parmesan-crumb mixture. Make sure every surface is coated and gently press so it sticks.
- Preheat pan and oven: Heat a large oven-safe skillet over medium heat.
Add olive oil and butter. Preheat the oven to 400°F (200°C) while the pan heats.
- Sear to set the crust: Add chicken to the hot pan without crowding. Cook 2–3 minutes per side until golden.
You’re looking for color, not fully cooked meat. Work in batches if needed.
- Finish in the oven: Transfer the skillet to the oven (or move chicken to a baking sheet). Bake 6–10 minutes, depending on thickness, until the internal temperature hits 165°F (74°C).
- Rest and finish: Let the chicken rest 3–5 minutes.
Squeeze a little lemon over the top and sprinkle with parsley for a fresh finish.
- Serve: Pair with a crisp salad, garlicky green beans, buttered noodles, or mashed potatoes. A drizzle of extra-virgin olive oil over the top is a nice touch.
Storage Instructions
- Refrigerate: Cool completely, then store in an airtight container for up to 3–4 days.
- Freeze: Wrap pieces individually, then place in a freezer bag. Freeze up to 2 months.
Thaw overnight in the fridge.
- Reheat: For best crunch, reheat in a 350°F (175°C) oven or air fryer for 8–10 minutes. Avoid microwaving—it softens the crust.
Why This is Good for You
Chicken breast is a solid source of lean protein, which supports muscle repair and helps you stay satisfied. Parmesan adds calcium and a lot of flavor, so you can use less salt overall.
Garlic offers antioxidants and bold taste without extra calories. Using olive oil gives you heart-friendly fats, and baking after searing keeps the crust crisp without deep frying.
What Not to Do
- Don’t skip drying the chicken. Moisture prevents the crust from sticking and browning.
- Don’t overcrowd the pan. Crowding traps steam, making the coating soggy instead of crisp.
- Don’t use shredded Parmesan. Finely grated cheese clings better and melts into the crust evenly.
- Don’t under-season. Salt and pepper the chicken before dredging; it’s your base layer of flavor.
- Don’t overcook. Pull at 165°F. Overcooked chicken turns dry fast.
Recipe Variations
- Air Fryer: Preheat to 375°F (190°C).
Lightly spray the basket. Cook breaded chicken 6–8 minutes per side until golden and 165°F. Works great for extra crunch.
- Mayo or Yogurt Binder: Skip the egg and brush each piece with mayonnaise or Greek yogurt before pressing into the crumb mixture.
It adds moisture and helps the crust adhere.
- Gluten-Free: Use almond flour or a gluten-free blend for dredging and swap in gluten-free panko.
- Herb-Forward: Add chopped fresh parsley, basil, or thyme to the crumb mix for a brighter flavor.
- Spicy Kick: Stir 1/2 teaspoon red pepper flakes or cayenne into the crumb mix.
- Lemon Pepper: Add 1 teaspoon lemon zest to the crust and serve with extra lemon wedges.
- Cutlet Sandwiches: Tuck a piece into a toasted brioche bun with arugula and a smear of garlicky aioli.
FAQ
Stop wondering what's for dinner.
Get 7 healthy, family-friendly dinners complete with recipes and simple meal plans delivered straight to your inbox.
Can I use chicken thighs instead of breasts?
Yes. Use boneless, skinless thighs and pound to an even thickness. Sear as directed, then bake a few minutes longer.
Check for 165°F in the thickest part.
What if I don’t have panko breadcrumbs?
Regular breadcrumbs work fine, though the crust will be slightly less airy. Crushed cornflakes or crushed plain crackers also make a crisp crust.
Can I make this ahead?
You can bread the chicken up to 6 hours ahead. Place on a baking sheet, cover, and refrigerate.
Sear and bake just before serving for the best texture.
How do I keep the crust from falling off?
Dry the chicken well, dredge lightly in flour, and press the crumb mixture firmly. Let the coated chicken sit for 5–10 minutes before cooking to help the crust set.
Is fresh or pre-grated Parmesan better?
Freshly grated is best because it melts smoothly and tastes brighter. If using pre-grated, choose a fine, dry style rather than shredded.
Do I have to finish it in the oven?
You can cook it entirely on the stovetop over medium-low heat, but the crust may darken before the inside is done.
Sear-then-bake gives you the most reliable results.
Can I skip the flour step?
You can, but the crust may not adhere as well. The light flour coat helps the egg and crumbs cling for a more even, crispy finish.
What side dishes go best with this?
Try lemony arugula salad, roasted asparagus, sautéed zucchini, garlic mashed potatoes, or simple buttered pasta. A squeeze of lemon ties it all together.
Final Thoughts
Garlic Parmesan Crusted Chicken gives you big flavor with little fuss.
It’s crunchy, savory, and consistently juicy when you follow a few simple steps. Keep Parmesan and panko in the pantry, and you’re never far from a crowd-pleasing meal. Once you make it, you’ll find yourself returning to this recipe again and again—for weeknights, guests, and everything in between.
Printable Recipe Card
Want just the essential recipe details without scrolling through the article? Get our printable recipe card with just the ingredients and instructions.
Loved This Recipe?
If you're looking for more simple, healthy dinners your family will actually eat, grab my FREE 7-Day Easy Dinner Reset. You'll get 7 easy dinner recipes, simple grocery lists, and a done-for-you plan that takes the stress out of mealtime.